Bullet Journaling simplified

My overall 2018 goal is to lead a more efficient life. To me this means getting rid of unnecessary clutter and keeping things simplified so that I have more time to breathe and live.

I was very excited when I heard about bullet journaling late last year. I lovemaking lists, writing down my goals and the things I have learned.

The idea of incorporating a creative element to my lists really appealed to me. However, I found the bullet journal process to be taking up a little more time than I could spare. I want to only keep one journal for the year and not have to keep transferring things from one journal to the next each time the journal ends.

So here is my simplified bullet journal for the year:

I started by listing all my 2018 goals, IMG_20180209_103620
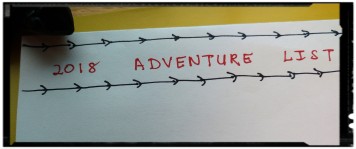
which I call my adventure list and placing it in the insight cover of my journal. Having it right at the start of the journal allows me to see it easily every time I open the journal. This keeps me on track with the plan for my year.

The INDEX page is truly a great idea. By numbering each page in the journal, I can write down the page number for each item in the index page. Going to the right page has never been easier.


You can list whatever you want to keep track of in your bullet journal and can IMG_20180209_103732decorate it as much or as little as you want. As you can see, I am more on the little side.

How my journal is different from most, is that instead of writing my daily to do list in the journal, I write it on a

IMG_20180209_103853separate piece of paper and then paper clip it to my journal. A lot of times, I write items that are not urgent, and need to be completed in a few days, so I can just move my to do list from one section of the journal to another.

When most items get done, I create a new to do list and add it to my journal after removing the old list. I feel that I save journal pages this way. At the end of the year, I do not need to remember  that on the week of Feb 5, I had to print some documents. This way when I look back at my 2018 journal, I can be reminded of things that were important to me.

If you like writing list and journaling, I definitely suggest trying a bullet journal. It can be very calming and fulfilling to see your goals achieved visually.

DIY Luggage tags

We are redoing our laundry room and part of the process has been to figure out what counter-tops, cabinets etc to purchase. Thankfully all the decisions have been made and now we need to install all our purchases.

We had some leftover counter-tops samples and I figured that they could be recycled into luggage tags. Using some hot glue, I stuck two pieces together, covered the sides with tape and stuck on some fabric decorations that I had.

img_20170122_0920064161img_20170122_194856232

Easy Coaster pattern (Crochet)

My 11 year old daughter has become quite a crocheter. She has been crocheting many mini-sombreros, coasters  and  dish cloths, as gifts. She came up with this coaster pattern that take her under 30 minutes to make.


20150719_135038


Abbreviations:

ch- chain

hdc- half double crochet

sc – single crochet

dc – double crochet

sl st- slip stitch


Magic circle ch 2

Round 1: 8 hdc in the circle, join with sl st

Round 2: ch 3, 2 dc in each stitch join with sl st

Round 3: ch 3, 2 dc in each stitch join with sl st

Round 4: ch 2, sc in each stitch

Round 5: switch colours,  ch 2, * sc in first 2 stitches 2 sc in next* repeat from * around, join with sl st

fasten off weave in all ends

Easy and practical homemade cleaners

With Earth day coming up, I decided to make some household cleaners. I have been wanting to do this for a while, but was not sure how best to proceed. I wanted this endeavor to be easy and stress free. Therefore I needed to find a few cleaners that were easy to prepare and would not require me to get a bunch of additional ingredients that I did not have around the house.

I am starting with three homemade cleaners
1) Handsoap/ dishwashing soap. This is not for the dishwasher. Instead it is for the kitchen sink.
I diluted Dr. Bronner’s castile soap 1:10 with water. (http://lisa.drbronner.com/?p=1127)
I used the lavender castile soap, for a lovely fragrance when washing the dishes.

2) All purpose spray. I got this recipe from David Suzuki’s Queen of Green
(http://www.davidsuzuki.org/publications/downloads/2011/QueenOfGreen-Green-cleaning-recipes.pdf) There are other recipes here as well.

This spray uses- castile soap, borax and essential oils. Once again if you use a castile soap with a scent, you can probably leave the essential oils out.

3) Vegetable wash. Just soak your vegetables in a bowl of water with 1/8 -1/2 cup of vinegar for about 10 minutes and rinse the vegetables well.

I am hoping that with these few simple and easy recipes, I will be able to make the change to become a little greener.

Happy Earth Day!

Easy Christmas decoration

As I am hosting Christmas dinner this year, I needed to have a few additional decorations to make the house look festive.  I really like this easy and inexpensive idea. I used bottles and vases that I had around the house and filled it with Epsom salts (represents snow). I got some inexpensive red berry decorations from the craft store and placed it in each jar. These bursts of red really liven up the house. You could also use any Christmas decorations that you have to put in the vases/ jars.

Now after Christmas, I can look forward to relaxing and having many baths with all the Epsom salt that I have.20131124_172205

Recycled funnel

I buy a lot of things in bulk and often have trouble putting the contents into bottles. This recycled milk funnel is fantastic and has saved me from a lot of wastage.

I cut of the top part of a 2 litre milk jug and wash it.

20130302_163203

When inverted, this make an easy funnel. You can even use it to fill small bottle. Just make sure that the mouth size of the bottle is the same size or bigger that your milk jug.


20130302_163444

Homemade Pinata

My daughter is turning 9 on Thursday. I can’t believe how quickly time has gone by. For her 9th birthday party, she had a sleepover party with a few of her friends. One of her party requests was to have a pinata that you pull instead of one that you hit. This easy project was fun to make with my darling.

We used a paper grocery bag as our base. The handles of the bag was cut off. Then the bottom was covered with tissue gift wrap paper.  Next we covered the bag with coloured streamers, working from the bottom. We kept going until we reached the top of the bag.

We did this project a little bit each day over a week. My daughter was assigned the task of snipping the edges of the streamers during the week. A task that she quite enjoyed doing.

The next thing we had to do was to add the yarn to the bottom of the bag. At the bottom of the bag, I made a small hole at each corner .

I prepared two sets of yarn that comprised of 6 strands each (the length can vary, make it long enough- remember the children are going to pull on it). From the bottom, outside of the bag, I threaded it into hole X and then pulled it out through the other hole X. I did the same with hole Y.  See diagram below. My yarns were now crisscrossed inside the bag, and when pulled hard enough, would cause the bag to break, allowing the contents to fall out.

The next step was to fill the bag with goodies. Remember that the items should not be too heavy, as they could break the bag or hurt the children when they fall out.

Once the bag was filled, I glued the top of the bag together.  Punched two small holes on either side of the bag, and using more yarn created a handle. I did reinforce the top holes to ensure that the bag did not break from the top and just fall on the kids, but it probably was not necessary.

    X                                                                                                              Y


   Y                                                                                                               X

The kids had lots of fun pulling the yarn to break the pinata. There were 4 girls at the party, as each held on to one corner of the bag and pulled away.

My happy project- Painting birdhouses


I have always liked birdhouses. Not sure why. Maybe because it represents comfort and refuge that it could bring to a bird. Recently, I had an idea, to paint birdhouses that I had, and put them in my garden. This brings a pop of colour to the garden, especially in the winter months.

My kids (with the help of my husband), made me two birdhouses from a kit that they got at an event we went to. I was very excited, because, it meant more garden decorations. I have put them this time, in the front of my house to add some curb appeal. Using the one stroke painting technique that I am trying to learn, I painted some flowers on the houses. I am by no means a skillful artist, however, I really enjoyed painting these houses. It brought me great joy, to paint them.
I wish you all a happy weekend! Hope you find some time to do something that makes you happy. We create how our moments are lived each day. We then get to savour the memories that we have created later.


Recycled wrapping

A while ago I uploaded a post about recycling milk cartons -https://lifemadehappy.wordpress.com/2012/04/20/recycling-milk-cartons/

This is another quick way to decorate a milk carton. A friend of mine will be going on a trip soon, so I used a map that I had on-hand to wrap up a clean carton that had been cut to size (I cut off the top of the carton).

I used some blue ribbon on the inside, to hide the unevenness in my wrapping on the inside. Next I punched some holes for the handle.


I used some gift tissue paper to line the carton on the inside and then put her present in it. The carton has now been recycled into a gift bag.


These cartons would also serve well as goody bag containers.

Happy Recycling! I would love to hear your recycling ideas as well.

Functional decoration

We have had a few power failures in our neighbourhood these past couple of years. Thankfully it has always occurred just after dinner was all cooked. Our candles are easily accessible, but then I am always scrambling for a place to put the candles. I recently found a bunch of tea light candles in one of my cupboards and was about to give them away, but then I thought I could easily use the candles as part of my decorations, so that I would have the candles easily available in the event of a power failure.  The pictures below are from my bathroom. The candles are now easily accessible for when we have a power failure and serve as added decoration. We have our regular white long candles as well in our emergency bag, but these tea light candles can be lit first to guide our way very quickly.

I painted these  little terracotta pots. The tealight candles fit in them very well. I put the pots in another terracotta pot filled with decorative sand.

The candle below I got from our friend. It looks pretty and will be very functional in a power failure, as  I already have a pretty container to place it on.

The candle below I made by pouring melted wax into a shell. When the wax was still soft, I inserted a candle wick.

I am quite pleased that I have made my decorations a little more functional.

Previous Older Entries

SKF2011